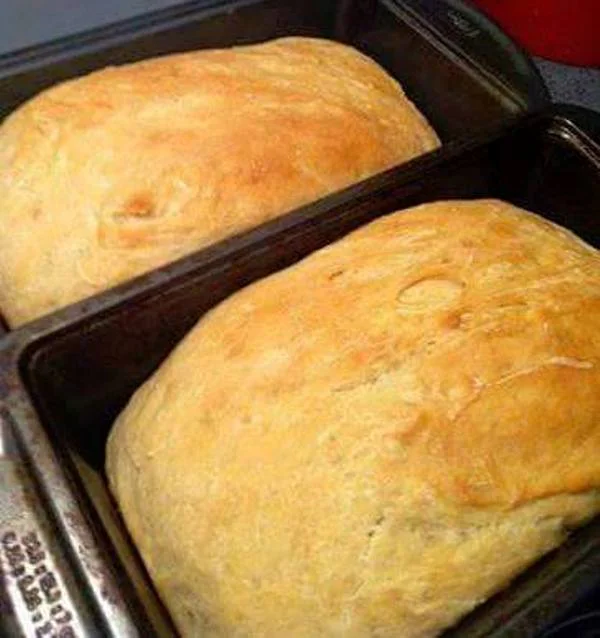
Easy Homemade Honey Bread is a simple yeast bread made with just five basic ingredients: warm water, honey, active dry yeast, salt, and bread flour. There are no eggs, milk, or butter in the dough, which makes this a handy recipe when I want homemade bread without making a special grocery run.
The honey gives the loaves a gentle sweetness rather than a dessert-like flavor. It also helps the crust brown nicely in the oven. The recipe makes two loaves, which I think is one of its best features. You can put one on the table and freeze the second before it disappears.
If yeast bread feels intimidating, this is a good place to start because there are only a few things to watch. The water should be warm rather than hot, the yeast should become foamy before the flour goes in, and the dough should feel soft instead of stiff and dry. After that, most of the work is simply giving it time to rise.
What Makes This Honey Bread So Approachable
I like that there is nothing complicated hiding in this dough. Honey provides the sweetness, bread flour gives the loaves enough structure, and two rises give the dough time to become light and puffy before baking.
The first rise happens in the bowl after kneading. That is when the dough should roughly double in size. The second happens after the dough is divided and shaped into loaf pans. I pay more attention to how the dough looks than to an exact number of minutes because a cool kitchen can slow yeast down quite a bit.
For more simple ideas that work for breakfast or alongside dinner, browse our breakfast recipes and side dishes.
A Few Ingredient Notes
Warm water: It should feel comfortably warm if you touch it, not hot. Water that is too hot can weaken or kill the yeast before the dough ever gets started.
Honey: Two-thirds cup gives the bread a noticeable honey flavor without turning it into sweet bread. Any mild everyday honey works well here.
Active dry yeast: Give the yeast a little time in the warm honey water before adding flour. A layer of foam on top is a reassuring sign that it is active.
Bread flour: Bread flour has more protein than all-purpose flour, which helps the dough build structure. I would still add it gradually rather than dumping all six cups in at once. Humidity, measuring style, and even the flour itself can change how the dough feels.
Salt: It may be a small amount, but it keeps the bread from tasting flat and balances the sweetness of the honey.
How the Dough Should Feel
One of the easiest mistakes with homemade bread is adding flour until the dough stops sticking completely. That usually goes too far. This dough should feel soft and slightly tacky after kneading, not dry or hard.
If it sticks heavily to your hands and the counter, add a little more flour. If it feels firm and difficult to knead, stop adding flour and keep working the dough for another minute or two before deciding it needs more.
After kneading, the surface should look smoother and the dough should spring back gradually when pressed with a fingertip.
Tips for a Better Rise
Check the yeast first. I would rather find out the yeast is inactive before adding six cups of flour. If the honey-water mixture still looks flat after 15 to 20 minutes, start again with fresh yeast.
Give the dough a warm, draft-free spot. It does not need to be hot. A comfortable room temperature is enough, although the rise may take longer in winter.
Do not rush the second rise. Once the loaves are in their pans, they should look noticeably puffier before going into the oven. That final rise has a big effect on the finished height and texture.
Let the bread cool before slicing. This is always the hardest part. Fresh bread smells good enough to cut immediately, but the crumb is still setting while the loaf cools. Waiting gives you much cleaner slices.
Ways We Can Use Honey Bread
This is an everyday loaf, so it works for much more than toast. Use it for sandwiches, grilled cheese, French toast, bread pudding, or simply serve thick slices with butter alongside soup or a casserole.
If the loaf is a day or two old, toasting brings back a lot of its texture. The light honey flavor is especially good with salted butter or peanut butter.
Storage and Freezing
Let the loaves cool completely before wrapping them. Store bread at room temperature in a bread bag or airtight container for about 2 to 3 days.
Because this recipe makes two loaves, freezing one makes a lot of sense. Wrap the cooled loaf tightly and freeze it for up to about 2 to 3 months. Thaw it at room temperature while still wrapped so it does not dry out.
Frequently Asked Questions
Why didn’t my bread rise?
The yeast may have been old, the water may have been too hot, or the room may simply have been cool. If the yeast foamed at the beginning but the dough is moving slowly, give it more time before assuming something went wrong.
Can I use all-purpose flour?
Yes. The bread may have a slightly softer structure and a little less chew, but all-purpose flour is a reasonable substitute. Add it gradually and judge the dough by texture rather than forcing in a fixed amount.
Is the bread very sweet?
No. You can taste the honey, but this is still an everyday loaf that works with savory foods as well as breakfast.
Ingredients
- 2 cups warm water
- 2/3 cup honey
- 1 3/4 tablespoons active dry yeast
- 1 1/2 teaspoons salt
- 6 cups bread flour, plus a little extra if needed for handling
How to Make Easy Homemade Honey Bread
- In a large mixing bowl, stir the warm water and honey together until the honey dissolves.
- Sprinkle the active dry yeast over the liquid. Cover the bowl loosely and let it stand for about 10 to 15 minutes, or until the surface looks foamy.
- Stir in the salt.
- Add the bread flour about 1 cup at a time. Use a whisk or sturdy spoon at first, then switch to a wooden spoon or spatula as the dough becomes thicker.
- When the dough is too thick to stir, turn it onto a lightly floured surface or knead it in the bowl.
- Knead for about 5 to 8 minutes, adding only enough extra flour to keep the dough manageable. The finished dough should feel soft and slightly tacky rather than dry.
- Place the dough in a lightly greased large bowl. Cover and let it rise in a warm place until roughly doubled in size, about 1 hour depending on room temperature.
- Gently press the air out of the dough.
- Divide the dough into two equal portions and shape each into a loaf.
- Place the loaves in two lightly greased loaf pans.
- Cover and let them rise again for about 30 minutes, or until noticeably puffy.
- Preheat the oven to 325°F while the loaves finish rising.
- Bake for 30 to 35 minutes, or until the tops are golden and the loaves sound hollow when tapped.
- Let the bread cool in the pans for about 10 minutes, then move the loaves to a wire rack.
- Cool before slicing for the cleanest texture.
