
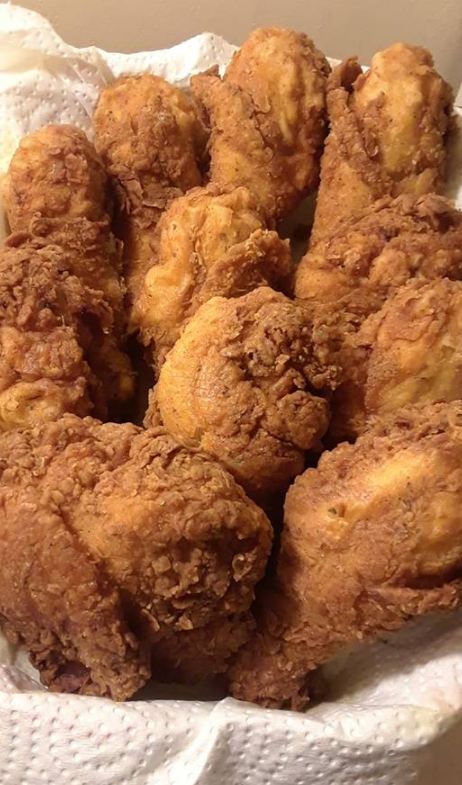
Homemade Buttermilk Fried Chicken is all about two things: getting flavor into the chicken before frying and building a flour coating with enough texture to turn deeply crisp in the oil. This version marinates bone-in, skin-on chicken in seasoned buttermilk, then dredges it in flour with paprika, oregano, cayenne, garlic, onion, and baking powder.
I would rather spend extra time on the marinade and coating than rush the frying stage. Once the chicken is in hot oil, temperature control matters more than a rigid number of minutes because wings, drumsticks, thighs, and breast pieces do not all cook at the same speed.
Two corrections from the old post: the wet mixture is buttermilk, not yogurt, and the dry coating uses 1 teaspoon black pepper. The earlier page had transcription errors in both places.
Why Buttermilk Helps Fried Chicken
Buttermilk gives the seasoning something to cling to and helps the flour form those irregular craggy pieces that fry into a crunchy crust. The slight acidity also works well with chicken during a long refrigerated marinade.
I keep the chicken refrigerated while it marinates. When I am ready to fry, I take out only what I need while I prepare the dredge and oil rather than leaving raw poultry sitting on the counter for an extended period.
Ingredients
- 3.3 pounds / 1.5 kg whole chicken, cut into pieces, or a similar amount of bone-in, skin-on chicken pieces
- About 4 cups / 1 liter neutral vegetable oil, or enough for deep frying
Buttermilk Marinade
- 2 cups / 500 ml buttermilk
- 1 teaspoon paprika
- 1 teaspoon cayenne pepper
- 1 teaspoon white pepper
- 1 teaspoon onion powder
- 1 teaspoon garlic powder
- 1 teaspoon salt
Seasoned Flour
- 2 1/2 cups / 375 g all-purpose flour
- 1 tablespoon paprika
- 2 teaspoons dried oregano
- 2 teaspoons baking powder
- 1 1/2 teaspoons salt, plus a little extra for finishing
- 1 teaspoon onion powder
- 1 teaspoon garlic powder
- 1 teaspoon cayenne pepper
- 1 teaspoon black pepper
My Three Priorities for Crisp Fried Chicken
Coat every crevice. I press the seasoned flour onto the chicken instead of giving it one quick roll through the bowl. The uneven clumps of flour and buttermilk are what become the crunchiest parts.
Do not overload the pot. Too many pieces at once can drop the oil temperature sharply and make the coating greasy before it crisps.
Use a thermometer for the chicken. Golden color tells me about the crust, not food safety. I check the thickest part of each piece and make sure the chicken reaches at least 165°F.
How to Make Homemade Buttermilk Fried Chicken
- Combine the buttermilk with the paprika, cayenne, white pepper, onion powder, garlic powder, and salt.
- Add the chicken and turn the pieces until fully coated.
- Cover and marinate in the refrigerator for at least 4 hours and up to 24 hours.
- When ready to fry, combine all of the seasoned-flour ingredients in a wide shallow bowl or tray.
- Lift one chicken piece from the buttermilk and let the heaviest excess drip off.
- Press the chicken firmly into the seasoned flour, making sure the coating gets into every fold and crevice.
- Transfer the coated piece to a wire rack and repeat with the remaining chicken.
- Heat enough neutral oil in a deep heavy pot to safely cover the depth of the chicken pieces. Bring the oil to about 350°F.
- Carefully lower a few similar-size chicken pieces into the oil. Do not crowd the pot.
- The oil temperature will fall when the chicken goes in. Adjust the heat as needed and try to keep it around 320°F while the chicken cooks.
- Fry until the coating is deep golden and the thickest part of the chicken reaches at least 165°F on a food thermometer. Depending on the cut and size, this may take roughly 10 to 15 minutes total, but temperature—not color or the clock—is the final check.
- Return the oil to about 350°F before adding the next batch.
- Transfer finished chicken to a wire rack set over a tray or paper towels.
- Season lightly with salt while hot and let the crust set for a few minutes before serving.
How I Keep the Coating from Falling Off
First, I press the flour firmly into the buttermilk-coated surface. Second, I let the coating sit briefly on a rack while the oil finishes heating. And once a piece goes into the pot, I avoid moving it constantly during the first few minutes.
Oil that is far too hot can brown the crust before the center cooks. Oil that is too cool can make the coating absorb excess grease. A thermometer makes that balance much easier to manage.
Which Chicken Pieces Work Best?
Bone-in, skin-on thighs, drumsticks, wings, and smaller breast pieces all work. I group similar cuts together in the same batch because they cook at more similar rates.
If using a whole cut-up chicken, large breast sections may need to be divided into smaller pieces so the crust does not overbrown before the center reaches a safe temperature.
Serving Ideas
Serve this with biscuits, potato salad, coleslaw, macaroni and cheese, corn, mashed potatoes, or a simple green salad. For more dinner ideas, browse my chicken recipes.
Storing and Reheating Fried Chicken
Refrigerate leftovers promptly in a covered container. For the best crust, I prefer reheating fried chicken in the oven or air fryer rather than the microwave.
Reheat until hot through the center. Do not leave cooked chicken sitting at room temperature for long periods before refrigerating it.
Fried Chicken Troubleshooting
Why is my crust dark before the chicken is cooked?
The oil is probably too hot or the chicken pieces are too large. Lower the heat slightly and fry similar-size cuts together.
Why is the coating greasy?
The oil may have fallen too cool, often because too much chicken was added at once. Fry smaller batches and allow the oil to recover between them.
Can I tell chicken is safe just because the juices run clear?
No. Appearance is not a reliable food-safety test. Use a food thermometer and cook poultry to at least 165°F in the thickest part.
